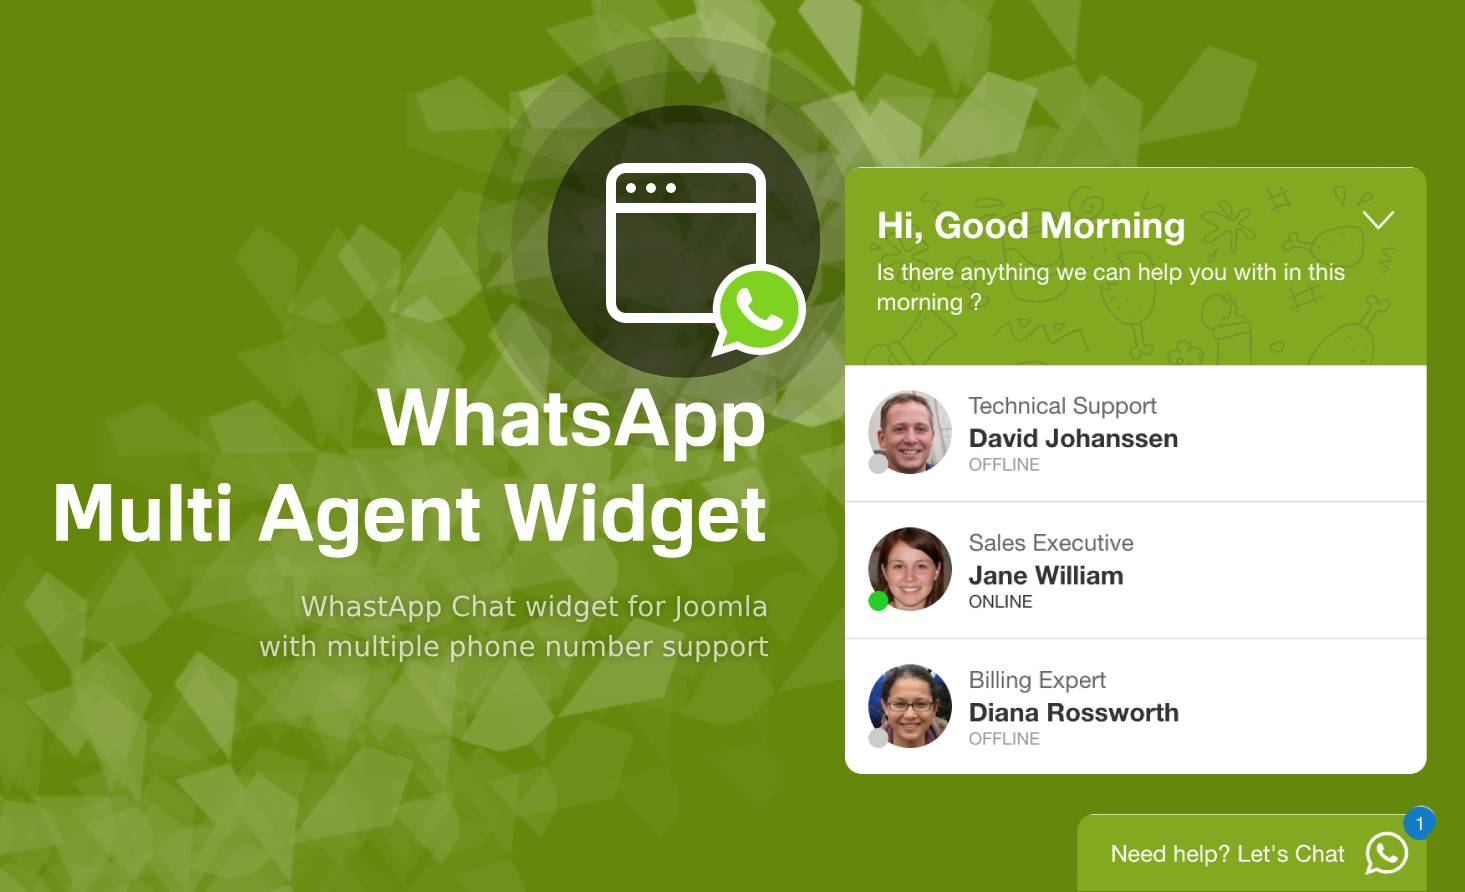
How To Make A Whatsapp Chat Widget For Blogger | Floating Whatsapp Chat Button
Introduction
Some bloggers may choose to maintain their Whatsapp privacy, but there are also some who write down their whatsapp numbers or contacts that are easy to contact for business and so on.
One of the advantages of this widget is that it is easier to customize, you can change the color and width of the widget easily, see the procedure for creating a Whatsapp chat widget below:
How To Use
You Can Watch the Video Or Follow Given Steps
Step 1 - CSS
First you have to do is go to the Edit HTML template menu and add the CSS code below to the CSS code group on your blog.
  /* Chatbox Whatsapp */
  :root {
    --warna-background: #4dc247; /*Header Bg*/
    --warna-bg-chat: #f0f5fb; /*Chat Bg*/
    --warna-icon: #fff; /*Icon Bg*/
    --warna-text: #505050; /*Text Color*/
    --warna-text-alt: #989b9f;
    --lebar-chatbox: 320px;
  }
  .sticky-button{position:fixed;background-color:var(--warna-background);bottom:20px;left:20px;width:55px;height:55px;border-radius:50px;box-shadow:0 2px 5px 0 rgba(0,0,0,.1);z-index:20;overflow:hidden;}
  .sticky-button a, .sticky-button label{display:flex;align-items:center;width:55px;height:55px;-webkit-transition:all .3s ease-out;transition:all .3s ease-out;}
  .sticky-button a svg, .sticky-button label svg{margin:auto;fill:var(--warna-icon)}
  .sticky-button label svg.svg-2{display:none}
  .sticky-chat{position:fixed;bottom:70px;left:20px;width:var(--lebar-chatbox);-webkit-transition:all .3s ease-out;transition:all .3s ease-out;
  z-index:21;opacity:0;visibility:hidden;line-height:normal}
  .sticky-chat .chat-content{border-radius:10px;background-color:#fff;box-shadow:0 2px 5px 0 rgba(0,0,0,.05);overflow:hidden}
  .sticky-chat .chat-header{position:relative;display:flex;align-items:center;padding:15px 20px;background-color:var(--warna-background);overflow:hidden}
  .sticky-chat .chat-header:after{content:'';display:block;position:absolute;bottom:0;right:0;width:70px;height:65px;background:rgba(0,0,0,.040);border-radius:70px 0 5px 0;}
  .sticky-chat .chat-header svg{width:35px;height:35px;flex:0 0 auto;fill:var(--warna-icon)}
  .sticky-chat .chat-header .title{padding-left:15px;font-size:14px;font-weight:600;font-family:'Roboto', sans-serif;color:var(--warna-icon)}
  .sticky-chat .chat-header .title span{font-size:11px;font-weight:400;display:block;line-height:1.58em;margin:0;}
  .sticky-chat .chat-text{display:flex;flex-wrap:wrap;margin:25px 20px;font-size:12px;color:var(--warna-text)}
  .sticky-chat .chat-text span{display:inline-block;margin-right:auto;padding:10px 10px 10px 20px;background-color:var(--warna-bg-chat);border-radius:3px 15px 15px}
  .sticky-chat .chat-text span:after{content:'Just now';display:inline-block;margin-left:15px;font-size:9px;color:var(--warna-text-alt)}
  .sticky-chat .chat-text span.typing{margin:15px 0 0 auto;padding:10px 20px 10px 10px;border-radius:15px 3px 15px 15px}
  .sticky-chat .chat-text span.typing:after, .chat-menu{display:none}
  .sticky-chat .chat-text span.typing svg{height:14px;fill:var(--warna-text-alt)}
  .sticky-chat .chat-button{display:flex;align-items:center;margin-top:15px;padding:12px 20px;border-radius:10px;background-color:#fff;box-shadow:0 2px 5px 0 rgba(0,0,0,.05);overflow:hidden;font-size:12px;color:var(--warna-text)}
  .sticky-chat .chat-button svg{width:20px;height:20px;fill:var(--warna-text-alt);margin-left:auto;transform:rotate(40deg);-webkit-transform:rotate(40deg)}
  .chat-menu:checked + .sticky-button label{-webkit-transform: rotate(360deg);transform: rotate(360deg);}
  .chat-menu:checked + .sticky-button label svg.svg-1{display:none}
  .chat-menu:checked + .sticky-button label svg.svg-2{display:table-cell}
  .chat-menu:checked + .sticky-button + .sticky-chat{bottom:90px;opacity:1;visibility:visible}
Description: In the section : root {} you can change the header color, icon and widget width to your liking. Also change the text left which has been marked with right to change the position of the widget so that it is on the right
Step 2 - HTML code
There are two options for placing this HTML code, the first is the easiest one on the Blogger Layout menu, add a new HTML widget in the sidebar and paste all the HTML code below. The second is to paste all the HTML code below before the tag , it's all the same, it's up to you to choose which method.
  <input class='chat-menu hidden' id='offchat-menu' type='checkbox' />
<div class='sticky-button' id='sticky-button'>
  <label for='offchat-menu'>
    <svg class='svg-1' viewBox='0 0 32 32'><path d='M16,3A13,13,0,0,0,4.53,22.13L3,27.74a1,1,0,0,0,.27,1A1,1,0,0,0,4,29a.84.84,0,0,0,.27,0l5.91-1.65a1,1,0,0,0-.53-1.93L5.42,26.56l1.15-4.3a1,1,0,0,0-.1-.76A11,11,0,1,1,16,27a11.23,11.23,0,0,1-1.84-.15,1,1,0,0,0-1.15.82,1,1,0,0,0,.82,1.15A13,13,0,1,0,16,3Z'></path><path d='M15,11.21l-1.16-1.6a2.06,2.06,0,0,0-1.5-.84,2.08,2.08,0,0,0-1.62.6l-1.2,1.2a2.81,2.81,0,0,0-.8,2.08c0,1.77,1.36,4,4,6.6,3.09,3,5.23,4,6.69,4a2.7,2.7,0,0,0,2-.81l1.2-1.2a2,2,0,0,0-.24-3.11L20.8,17a2.09,2.09,0,0,0-1.83-.3l-1.49.47a.53.53,0,0,1-.26-.09,11.42,11.42,0,0,1-2.35-2.26.31.31,0,0,1,0-.11c.13-.44.35-1.15.5-1.64A2,2,0,0,0,15,11.21Zm1.29,7.63a2.33,2.33,0,0,0,1.75.2l1.54-.46,1.61,1.25L20,21c-.48.47-2.25.33-5.86-3.21-3-2.91-3.41-4.5-3.41-5.18A.89.89,0,0,1,11,12l1.28-1.19,1.18,1.65c-.16.49-.39,1.22-.51,1.65A2.12,2.12,0,0,0,13,15.51,11.24,11.24,0,0,0,16.33,18.84Z'></path></svg>
    <svg class='svg-2' viewbox='0 0 512 512'>
      <path d='M278.6 256l68.2-68.2c6.2-6.2 6.2-16.4 0-22.6-6.2-6.2-16.4-6.2-22.6 0L256 233.4l-68.2-68.2c-6.2-6.2-16.4-6.2-22.6 0-3.1 3.1-4.7 7.2-4.7 11.3 0 4.1 1.6 8.2 4.7 11.3l68.2 68.2-68.2 68.2c-3.1 3.1-4.7 7.2-4.7 11.3 0 4.1 1.6 8.2 4.7 11.3 6.2 6.2 16.4 6.2 22.6 0l68.2-68.2 68.2 68.2c6.2 6.2 16.4 6.2 22.6 0 6.2-6.2 6.2-16.4 0-22.6L278.6 256z'></path>
    </svg>
  </label>
</div>
<div class='sticky-chat'>
  <div class='chat-content'>
    <div class='chat-header'>
      <svg viewbox='0 0 32 32'><path d='M24,22a1,1,0,0,1-.64-.23L18.84,18H17A8,8,0,0,1,17,2h6a8,8,0,0,1,2,15.74V21a1,1,0,0,1-.58.91A1,1,0,0,1,24,22ZM17,4a6,6,0,0,0,0,12h2.2a1,1,0,0,1,.64.23L23,18.86V16.92a1,1,0,0,1,.86-1A6,6,0,0,0,23,4Z'></path><rect height='2' width='2' x='19' y='9'></rect><rect height='2' width='2' x='14' y='9'></rect><rect height='2' width='2' x='24' y='9'></rect><path d='M8,30a1,1,0,0,1-.42-.09A1,1,0,0,1,7,29V25.74a8,8,0,0,1-1.28-15,1,1,0,1,1,.82,1.82,6,6,0,0,0,1.6,11.4,1,1,0,0,1,.86,1v1.94l3.16-2.63A1,1,0,0,1,12.8,24H15a5.94,5.94,0,0,0,4.29-1.82,1,1,0,0,1,1.44,1.4A8,8,0,0,1,15,26H13.16L8.64,29.77A1,1,0,0,1,8,30Z'></path></svg>
      <div class='title'>Silahkan chat dengan tim kami <span>Admin akan membalas dalam beberapa menit</span></div>
    </div>
    <div class='chat-text'>
      <span>Halo, Ada yang bisa kami bantu?</span>
      <span class='typing'><svg viewbox='0 0 512 512'><circle cx='256' cy='256' r='48'></circle><circle cx='416' cy='256' r='48'></circle><circle cx='96' cy='256' r='48'></circle></svg></span>
    </div>
  </div>
  <a class='chat-button' href='https://api.whatsapp.com/send?phone=YourNUmber&text=GoodMorning,%20I%20Need%20Help' rel='nofollow noreferrer' target='_blank'>
    <span>Mulai chat...</span>
    <svg viewBox='0 0 32 32'><path class='cls-1' d='M19.47,31a2,2,0,0,1-1.8-1.09l-4-7.57a1,1,0,0,1,1.77-.93l4,7.57L29,3.06,3,12.49l9.8,5.26,8.32-8.32a1,1,0,0,1,1.42,1.42l-8.85,8.84a1,1,0,0,1-1.17.18L2.09,14.33a2,2,0,0,1,.25-3.72L28.25,1.13a2,2,0,0,1,2.62,2.62L21.39,29.66A2,2,0,0,1,19.61,31Z'></path></svg>
  </a>
</div>
Description: Change the YourNUmber with Your Whatsapp Number.
Conclusion
Thanks For Visiting Please Visit Again

Comments